Friday, October 9, 2015

Tee Shirt Refashion: The Yellow Monstrosity

So, here's the thing about being plus-sized and lumpy: Tee shirts suck. Hard. All the cute ones are made for tiny twiggy chicks, and all the ones that come in my size are either matronly or manly. Nothing fits right, especially the ones I actually want. 

I've been toying with the idea of modifying some shirts to improve their fit, and tonight I finally busted out the sewing machine for the maiden voyage. 

I chose a shirt that no one in the house was using and put it on. Too big for The Hubbs, all kinds of wrong for me. 


Yuck. 

Then I cut another shirt into strips, hacked some side seams into the yellow monstrosity and spent some quality time with my pin cushion. 

Four straight lines later, and this is the result:


Not too shabby, eh?

'Specially since I had fully expected my first attempt to be a big, fat flop. Turns out the shirt I expected to throw out may just stick around for a while after all. Hell, I think I may even LIKE it now! 

And I have a sneaking suspicion I've found a new hobby. 


'Till next time,
OCB

Thursday, April 3, 2014

The Lumberjack

I know what you're thinking: Bearded hats?  Yowza!  Where have these things been all my life?!?  I know this because I, too, went too long without fully appreciating the fawesomeness of the bearded hat.

You've seen The Grey and the Striking Viking.  Though they were my first bearded hat designs from scratch, I'll admit they were not my first foray into the world of bearded glory.  The first was The Lumberjack:

It all starts with a beanie.

A rather unassuming beanie, really.

And then you add the beard.

Being my first beardednessissitude, I wussed out and used someone else's pattern.  Her blog is super cool, and it's called I'm Topsy Turvy.  You can find the beanie pattern here, and the beard here.  The patterns are easy to follow, and the stuff turns out right.  If you crochet using other people's patterns, you know this is not always a guarantee.  Even if you aren't quite ready for the glory of the beard just yet, this beanie is super cozy and works up in no time.

It's really crazy how warm this little beard keeps your face, though.  And how awesome it makes everyone look.  And by awesome, I mean not at all creepy.  Even if you're a chick.

Sunday, March 2, 2014

Ms. Flutterby

Okay, y'all.  Back to Sam the Dragon.  This little dude has been part of my life for the last decade, and he's been hangin' with The Hubbs since the 1980's.

The comic strip is totally adorable and suitable for all ages, so check it out.  Maybe even bookmark it (hint, hint).  It updates with new content every Tuesday, Thursday and Sunday.

The main cast of characters includes Sam the Dragon, Corny the Unicorn, Zen the Fish and Ms. Flutterby.  You've all met Sam, Corny and Zen already, so I think it's about time we introduce the muscle: Ms. Flutterby.


Now, I've done plenty of amigurumi plushes in the past, but I decided to get majorly picky about Ms. Flutterby.  I didn't want her to look like any other crochet doll, and I put a lot of thought into how certain things would work.  Her hair, for instance, is different from anything I've ever done:


Her head and body are all one continuous piece, no sewing involved, and her arms are movable thanks to the way they've been attached (hint: safety eyes ain't just for makin' pretty faces, y'all).  A little hand-embroidering on the mouth and bodice of her dress to add some sweet little details.


And, of course, she has to wear panties.  It wouldn't be proper for a lady to go commando, after all.  Oh, and can't forget the ballet flats and crown!  A girl needs her accessories.  And it never hurts to have Leroy Jethro Gibbs behind you.


Next, her skirt:


The wings...that was interesting.  Here's a hint as to how I tackled this particular obstacle: pipe cleaners.  I bent and twisted them into the shape I wanted and crocheted around it, smooshing the stitches very close together to cover the green pipe cleaner so it wouldn't show through the pretty blue wings.


Then I basically went nuts with a needle and the yarn, making a kind of spider webby pattern to fill in the wings. Reinforcing the center so they wouldn't pull apart was a bit of a bulky job, and I think I'll be modifying that process for future Flutterbys.  Once that was done, I attached the wings to her back and voila!  Instant fairy.


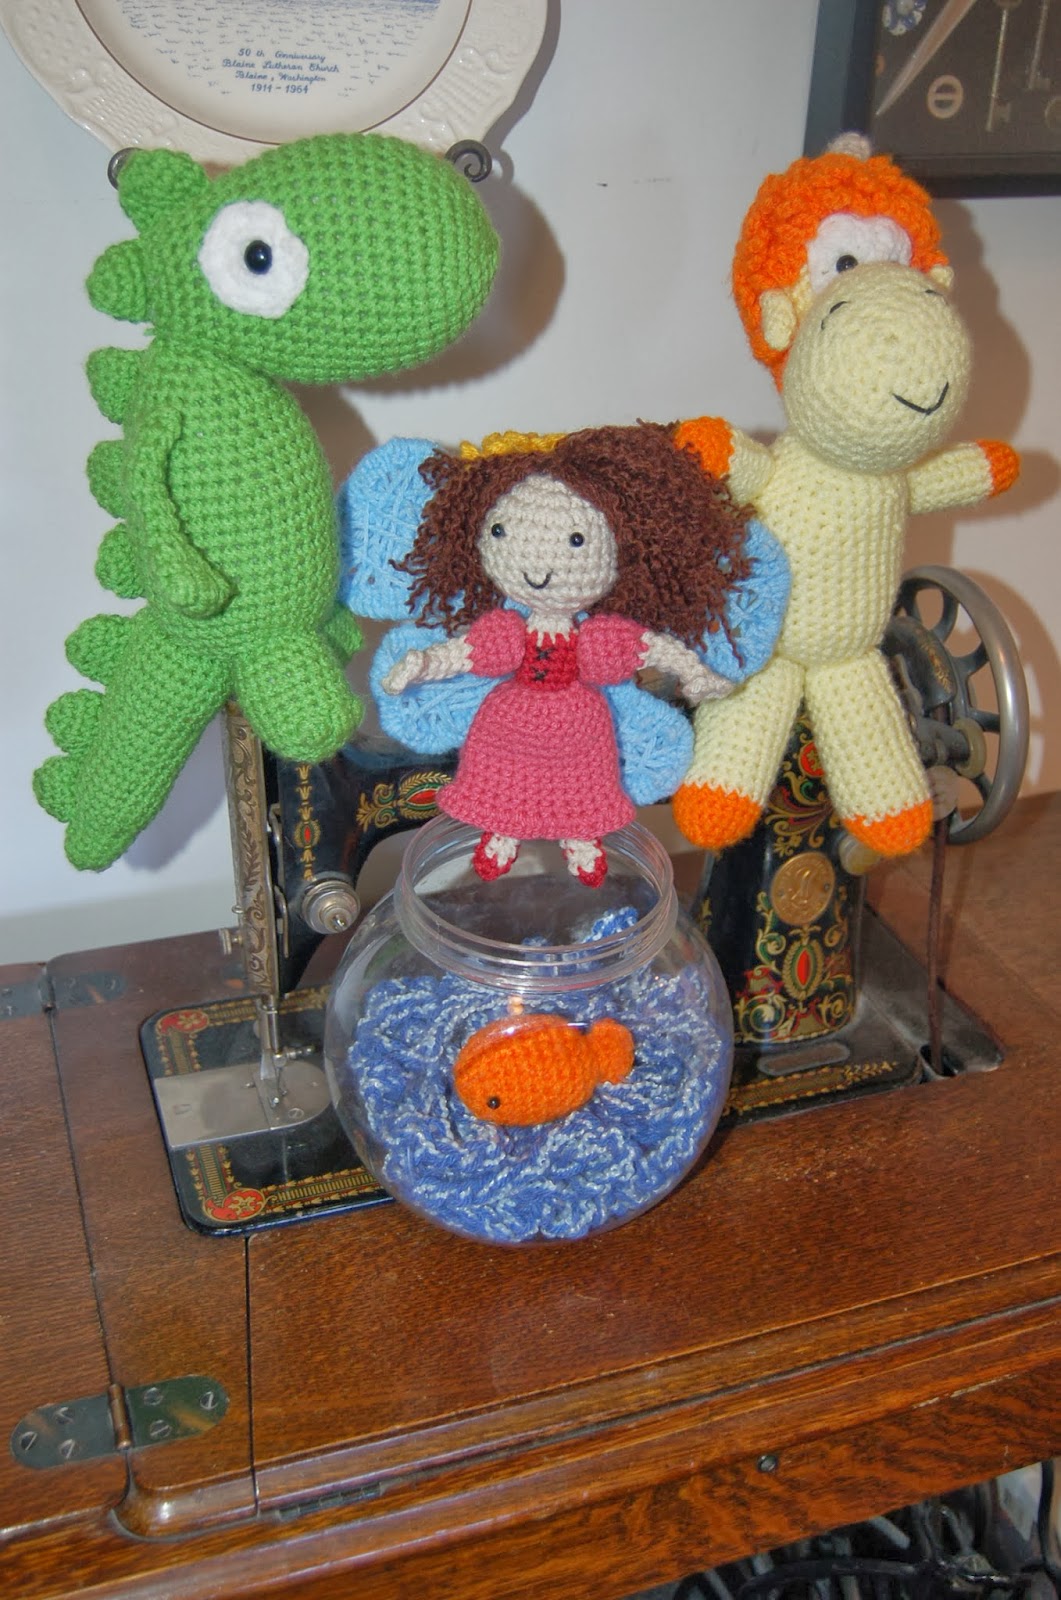
And last, but not least, the gang's all finally together:


And I'm fresh outta presents to make for K.  Now I guess I need to start getting creative with the ideas as well as the execution.  :)

Monday, February 24, 2014

The Grey

Who ever would have thought we'd be putting beards on hats?  I bet Gran's looking down at us and shaking her head, having a good laugh.  But the truth of the matter is that adding some kickass details to a hat, like - say - a beard, can turn it from a functional piece of gear to a costume.

Bear loved his Striking Viking so much that he tasked me with the creation of a Gandalf hat based on the Peter Jackson Lord of the Rings films.  Kind of a tall order, considering the assymetrical nature and wide brim.  Not always the easiest things to do with yarn, but I thought I'd give it a shot.  Gotta say, I am pretty flippin' proud of this one, y'all.

For those of you who haven't already Googled "Gandalf hat," here's what I used as my reference:


To start off with, I had to get the point right.  It involved a bit of finagling here and there, but I was happy with it pretty much from the start.


At this point, The Hubbs wasn't too sure about it.  He had lots of questions, and every time I asked for his opinion, I was answered with copious shrugging and the shifty eye.

Lots and lots of increase rounds...felt like each little piece took forever and the spacing of the increases was a challenge.  Too close together and I'd get these weird little bumpy things.  Too far apart and the shape wasn't right.


Somewhere along the way, it got big enough to start modeling, stitch markers and all.  Hot, yeah?


The brim posed the biggest challenge of all.  Now that I'd engineered the body of the hat to stand up on its own, I was faced with adding a wide brim and preventing it from flopping.  At first, I wasn't so sure it was going to work, but I kept on increasing.  As the brim grew, it became apparent that some sort of reinforcement would become necessary.


Not wanting to put any kind of crazy wire or mesh frame inside the hat itself, I decided to stiffen it.  I mixed Elmer's School Glue and water into about a half and half solution and used a foam brush to apply it liberally to the brim.  Then I let it dry and went through the process again.  While the glue solution was drying, I made the beard.


The Hubbs does a way better job at modeling the finished product than I do.  I guess I make a better Viking than a wizard, eh?  When all was said and done, even he was on board with the design.


Most importantly, Bear and his buddy loved the finished product.  Here they are together, The Striking Viking and The Grey:


I'm uber-happy with how these new costume hats have been turning out, and I will most certainly be making more of them in the future.  My Etsy shop has had quite the nice little rest recently, and I think it may be about time to dust off the shelves and get some new products in there.

Sunday, February 23, 2014

The Striking Viking

I've been wanting to design a Viking helmet for some time.  Just after Christmas, I began the process for a buddy. 

Base helmet beanie:


Horns added:


BEARD!


Ever seen a Viking play the banjo?


I love the mean face on this one:


And the lucky recipient, Bear, who can't go more than a few days without talking about the majesty of the beard:


After this one went over so well, he requested a Gandalf hat for a buddy's birthday.  I'll be sharing pics of that here soon.  

Gotta say, I'm starting to dig this business of designing things from the ground up.  I think dreaming things up and writing patterns is gonna end up being a thing for me. 


Sunday, February 16, 2014

Zen the Fish

Remember The Hubbs' comic strip, Sam the Dragon?


How about the crochet Sam I made for our beloved niece K's 4th birthday?


And the crochet Corny I made for her at Christmas 2012?


For K's fifth birthday, I added to the Sam family with Zen the Fish.  The main challenge here was that Zen lives in a bowl.  In water.  How to do that without breakable glass and still have Zen be someone K could play with?  Why, a plastic display jar and crocheted water, of course.


And here's the whole collection of Friends I've made for little K through her fifth birthday.  Gromit was first, followed by Totoro and then the Sam gang.

 
Coming soon: Ms. Flutterby, the Viking helmet, and the Gandalf hat.  Stay tuned!

Sunday, June 9, 2013

Hope


A year or so ago, I was going through a bit of a rough patch.  A customer gave me this, and I've kept it on my desk every day since.  She wrote a personal message on the back as well, and I hold this angel very close to my heart.

I've always been a hopeful kind of gal, but sometimes it helps to be reminded.

That said, I'm giving myself the summer off.  This should allow me time to complete and photograph some new projects to share with you in the fall.  I hope you all have a wonderful summer!

~OCB

Thursday, May 9, 2013

Soon

Hey, y'all!

I'm finishing up the tail-end of a two-week business trip, and I just haven't had time to write a post for this week.

There's so much I want to share with you, and I'll be back soon.  Stay tuned for more crafty goodness!


'Til next time,
OCB

Wednesday, May 1, 2013

Super-Bulky Infinity Scarf in Little Rock Granite

Hey, y'all!

I'm writing in the middle of the night from California, where I'm working this week.  It's been hectic, but I have a few minutes, so I thought I'd share a recent project with you.

And without further ado, I give you the Super-Bulky Infinity Scarf in Little Rock Granite:


This scarf works up quickly using Lion Brand Hometown USA (a super-bulky yarn) and a plastic Q hook.  The tie is made using the same yarn and an aluminum N hook.  Both can be made from the same skein of yarn, so the total $ investment is quite low.

What do you think...do you want to learn how to make one?  I'm thinking of publishing a pattern.  You know, when I have time.  :)


'Til next time,
OCB

Wednesday, April 24, 2013

Photo Tutorial: How to Complete an Invisible Join

Ever get sick of those little bumps that you get when fastening off a piece you've crocheted in the round?  Through trial and error, I've found a way to join that last round invisibly.

Note: this works best if you're joining each round with a slip stitch throughout the piece.  If you're working in a continuous spiral, it's tough to get a completely invisible join.  I've found that it helps me to place a marker in the first stitch of each round to avoid accidentally adding or dropping stitches along the way.

1.  Work the last round of your piece.  Do not join with a slip stitch.


2.  Fasten off by pulling the tail end of the working yarn through your last stitch.


3.  Using a yarn needle, thread the tail through the first stitch of the last round, from back to front.


4.  Here's what your piece will look like when you've pulled the entire tail through the first stitch.


5.  Using your yarn needle, thread the tail back through the center of the last stitch (the one you fastened off).


6.  Pull to secure, but not too tight.  When done right, your join will look exactly like any other stitch on your outside round.


7.  Weave in the tail end on the back of the piece, and - voila  - you have a completely invisible join!


Thanks for visiting...hope you found this helpful!


'Til next time,
OCB